
Hey there, tech enthusiasts! If you’re tired of the same old launcher setups on your Android device and are craving something fresh, minimalistic, and efficient, you’re in for a treat.
Today, we’re diving deep into the world of the Niagara Launcher a game-changer in the realm of Android customization. Buckle up as we explore its features, installation process, and pro tips to make your home screen not just a visual delight but also a productivity powerhouse.
If you are bored using regular launchers like the Nova launcher setups on your smartphone then this article might be helpful to you. As I said, I’m sharing how we can customize our Smartphone homescreen setups using the Niagara launcher. Also, check out Best Android homescreen Launchers for customization.
Why Niagara Launcher?
In the vast sea of Android launchers, Niagara stands out for its unique approach to minimalism and user-centric design.
Unlike traditional launchers that clutter your screen with endless icons and widgets, Niagara offers a streamlined experience, ensuring that your most important apps and information are always within thumb’s reach.
This design philosophy not only declutters your home screen but also enhances one-handed usability a boon for today’s larger smartphones.
Also read: Best Nova Launcher Setups for Your Android smartphone!
Getting Started: Installing Niagara Launcher
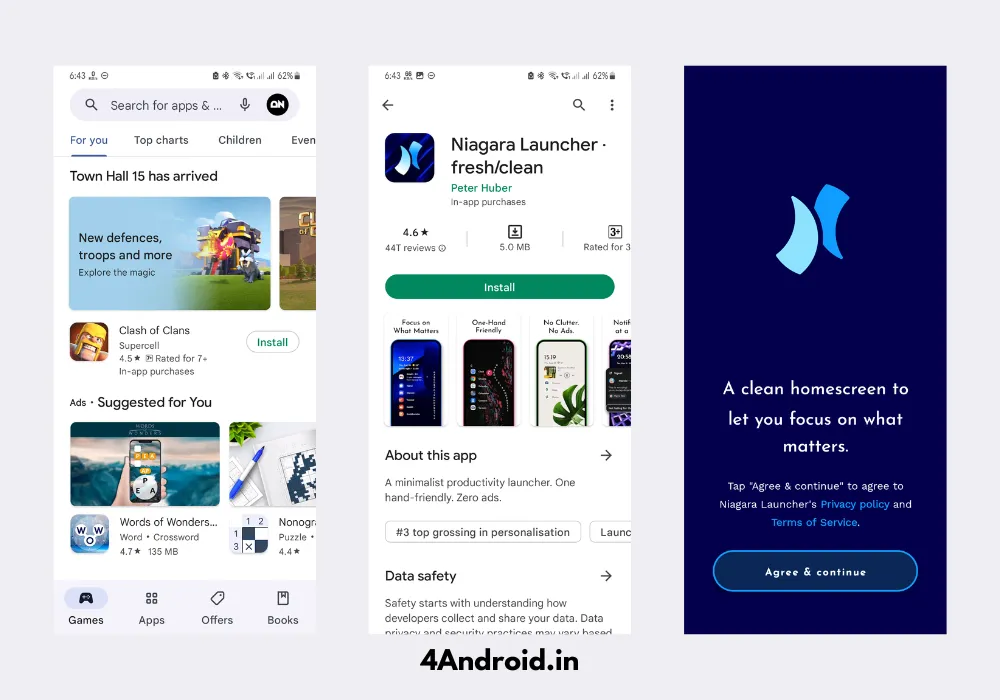
- Access the Play Store: Open the Google Play Store on your smartphone.
- Search for Niagara Launcher: Type “Niagara Launcher” into the search bar.
- Locate the App: In the search results, find “Niagara Launcher” developed by Peter Huber. You can also install it by clicking here
- Install: Tap the “Install” button to download and install the launcher.
- Launch the App: Once installed, open Niagara Launcher.
- Set as Default: Upon opening, you’ll be prompted to set Niagara as your default home screen app. If this prompt doesn’t appear:
- Navigate to your device’s Settings.
- Search for “Default apps” or “Home app”.
- Select “Niagara Launcher” from the list.
First-Time Setup: Tailoring Niagara to Your Needs
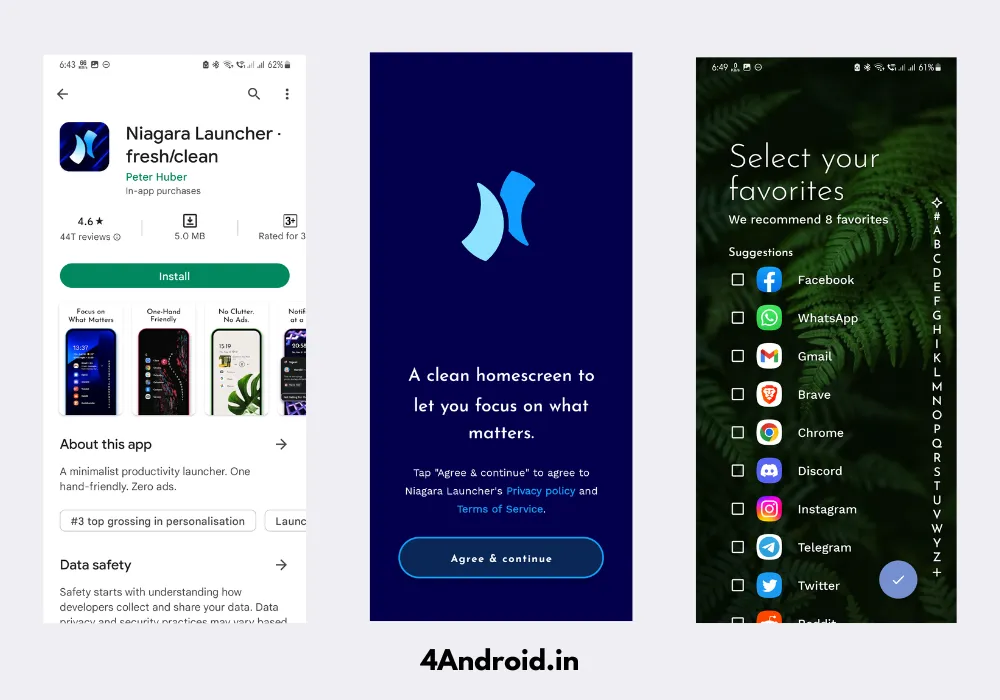
Upon launching Niagara Launcher for the first time, you’ll be guided through an initial setup to personalize your experience.
- Agree to Terms: Start by agreeing to Niagara’s terms of service.
- Select Favorite Apps: You’ll be prompted to choose your favorite apps to display on the home screen. This selection ensures that your most-used apps are always accessible.
- Finalize Setup: After selecting your favorites, tap the checkmark to complete the initial setup.
Diving Deeper: Customizing Your Home Screen Like a Pro
Niagara’s true strength lies in its customization capabilities. Let’s explore how you can make the launcher truly yours.
Adding Widgets
Widgets provide quick access to information and functionalities without opening apps. Here’s how to add them:
- Long-Press the Clock: On the home screen, long-press the clock or agenda widget at the top.
- Add Custom Widget: Tap on “Add custom widget” to select from available widgets.
For those looking to maximize space, Niagara offers widget stacks, allowing you to stack up to four widgets in the same space. Simply add multiple widgets, and Niagara will prompt you to create a stack. You can then swipe through them seamlessly.
Setting Up Notifications
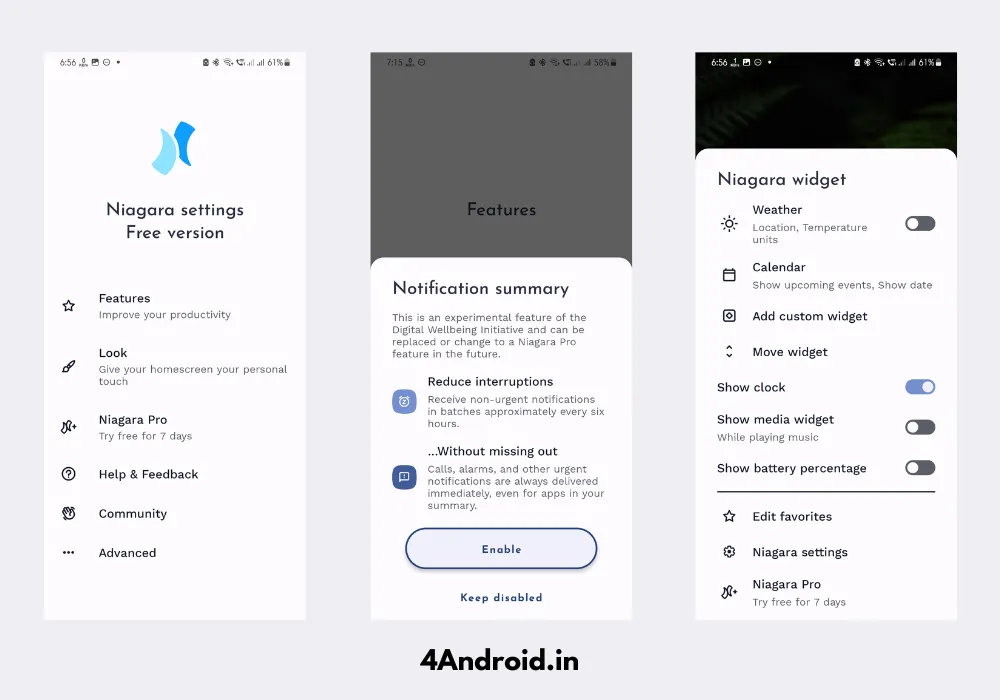
Stay on top of your notifications without the clutter:
- Access Niagara Settings: Long-press on the home screen and select “Niagara Settings.”
- Navigate to Features: Tap on “Features.”
- Enable Notifications: Select “Notifications” and toggle it on. Ensure you’ve granted the necessary app permissions for this feature to function correctly.
Personalizing the Look
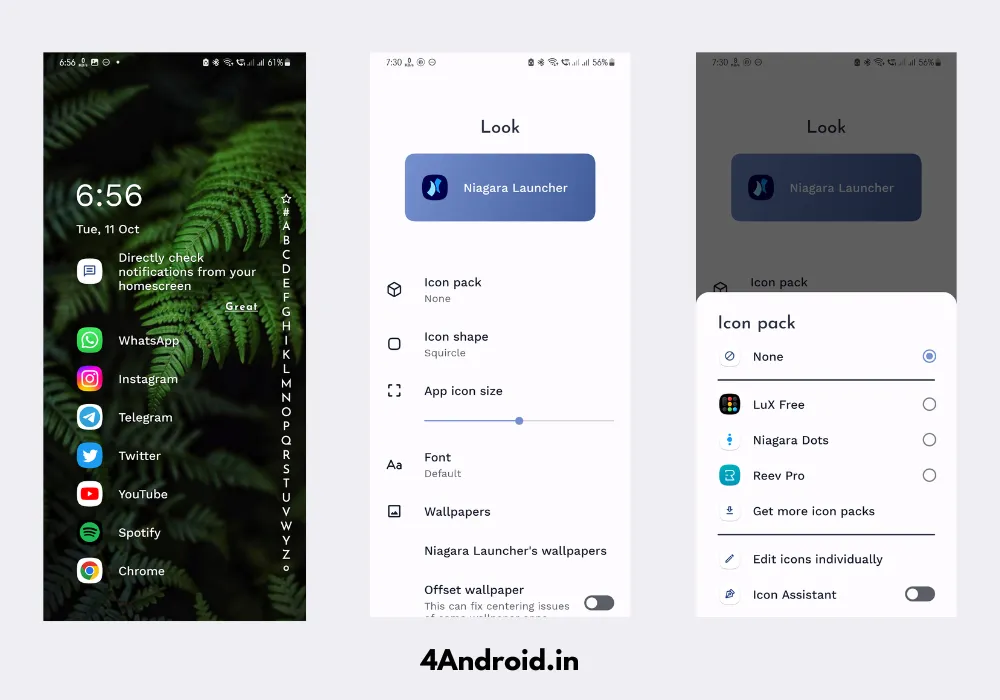
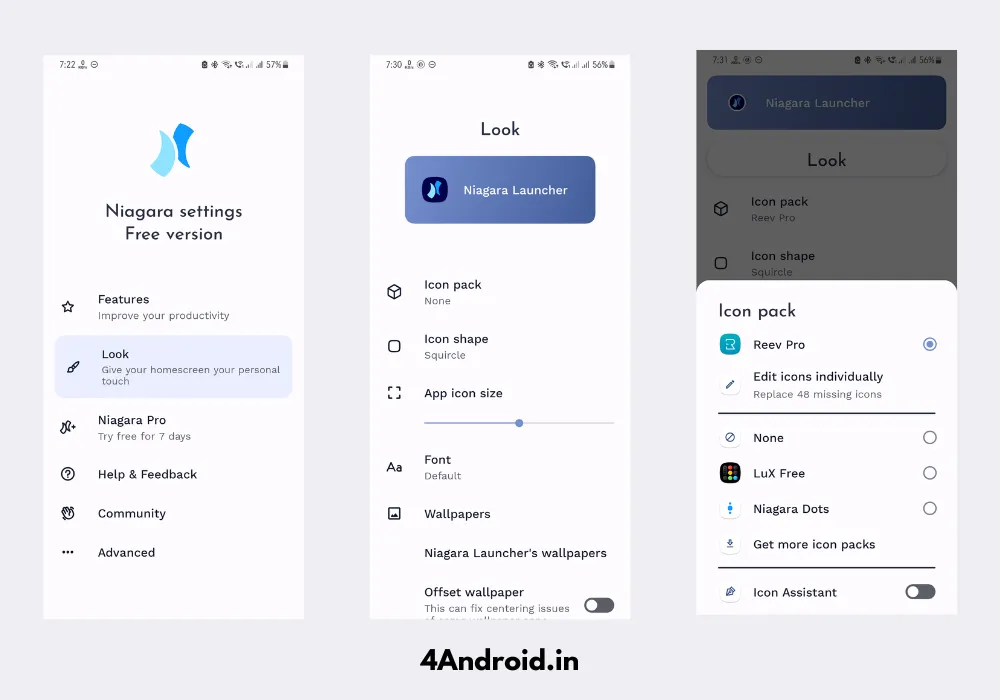
Make your home screen reflect your style:
- Open Look Settings: In “Niagara Settings,” tap on “Look.”
- Theme Color: Niagara dynamically adapts its interface colors based on your wallpaper. To customize:
- Go to “Theme color.”
- Choose a color that complements your wallpaper or suits your preference.
- Icon Packs: To change the appearance of your app icons. refer Niagara launcher help
- Install your desired icon pack from the Google Play Store.
- Navigate to “App icon pack” in the “Look” settings.Select your installed icon pack.
For Samsung users, note that icon packs from the Galaxy Store need to be applied through the Galaxy Themes app and have certain limitations when used with Niagara Launcher.
Pro Tips to Enhance Your Niagara Experience
- Left-Hand Mode: If you’re left-handed, Niagara allows scrolling on the left side for ease of use.
- Quick Notifications Access: Swipe right on an app to view its notifications and left to dismiss them.
- Global Notifications: Swipe down anywhere on the home screen to access Android’s notification tray.
- App Management: Long-press an app to add or remove it from your favorites or to reposition it.
- Dynamic Favorites: Over time, Niagara learns your app usage patterns and suggests apps at the bottom of your favorites for quick access.
Final Thoughts
By embracing Niagara Launcher, you’re opting for a cleaner, more efficient, and personalized Android experience. Its blend of minimalism and functionality ensures that your smartphone not only looks good but also works smarter. Dive into the settings, experiment with the features, and make your home screen a true reflection of your style and needs.
If you like this article then kindly consider joining our telegram channel @xtremegeeks for more homescreen setups.
Happy customizing!